Wallet
Wallets are used by the client to manage your dApp integration on BTTC. There are two main types of wallets used in the BTTC ecosystem:
TronLink
TronLink is the most feature-rich decentralized TRON wallet currently available. Sustain all of TRON's standard functions. TronLink supports testnets and custom networks via an open SDK. Simultaneously, TronLink receives support from the TRON core development team and connects seamlessly to the TRON mainnet.
Type: Unmanaged
Private key storage: local
Communication with TRON: TronGrid HTTP API
To manage your assets on the TRON network, we recommend using TronLink. Please refer to the official TRON document regarding the integration of TronLink:
MetaMask
MetaMask is a free and secure wallet that enables the interaction of web applications with multiple blockchains.
Please download the wallet from MetaMask and add its Chrome extension to your local Google Chrome before using it.
Following that, please create a new account in MetaMask. Please keep your password, private key, and mnemonic secure and do not share them with anyone.
Setting up BTTC on MetaMask
To view account fund activity on BTTC, you must configure the BTTC URL on MetaMask.
Please select custom RPC here to add BTTC's mainnet or testnet.
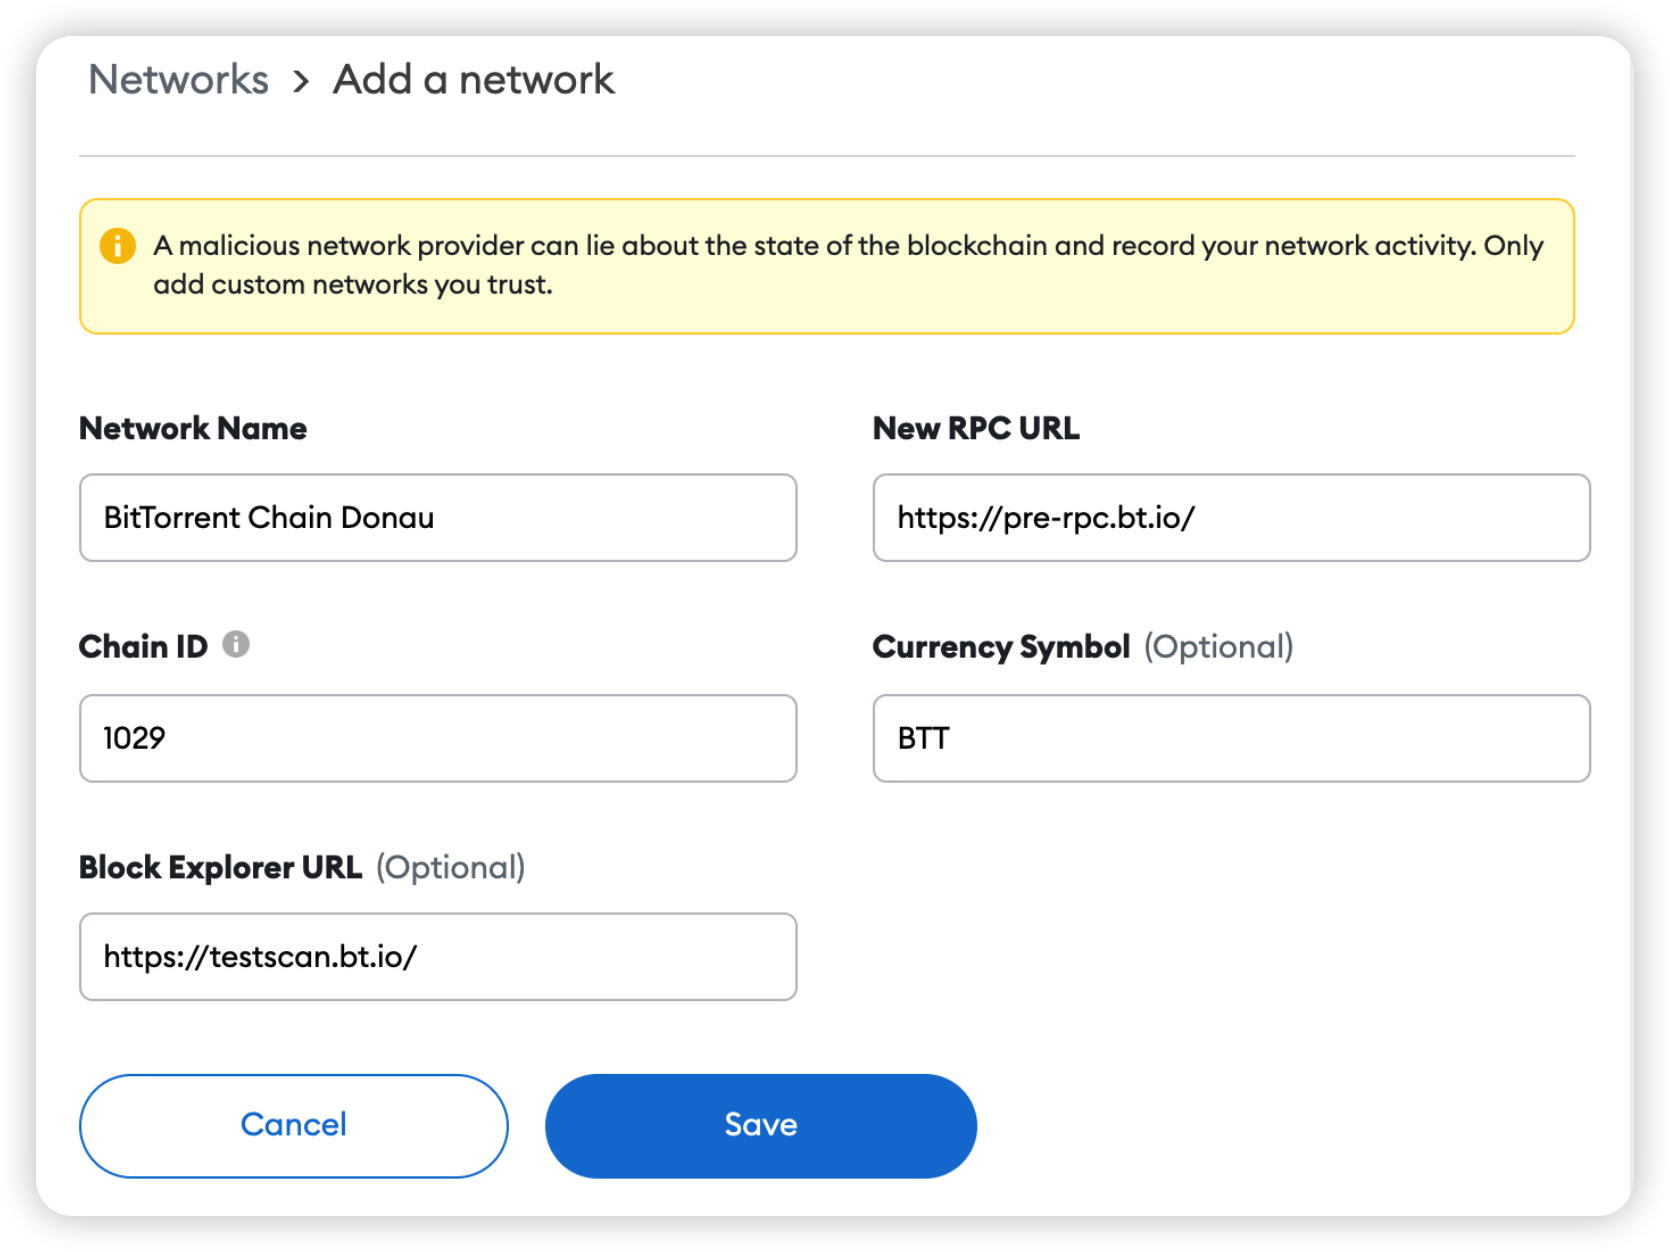
Please complete the form as shown in the figure below to correctly add the BTTC mainnet.
Setting up Custom Token
The following sections detail how to configure custom tokens on MetaMask. This method can be used to add any custom ERC-20 tokens to MetaMask
In MetaMask, click Add Token. The Token added here is the Ethereum Ropsten test network's Test Token. The address is 0x414C578d018afa9a4c9acf435a8C5fD042203901. The symbol is t. This token is only for demostration. After entering the token address, the following information will be automatically filled in, as illustrated in the figure:
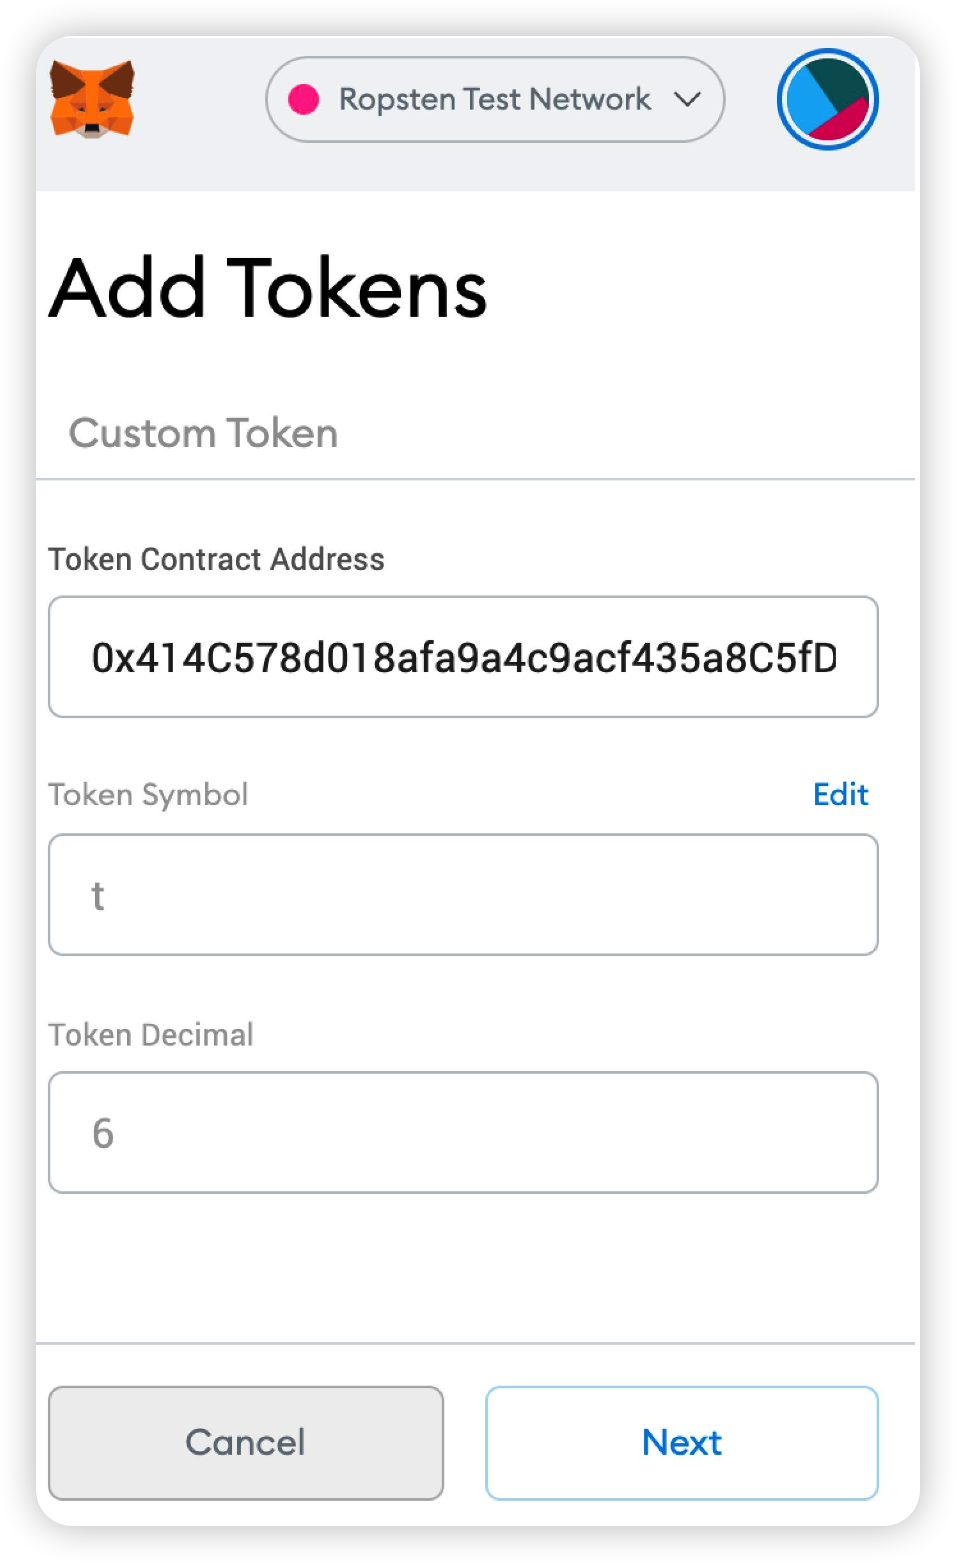
The token will be displayed in your MetaMask account once the addition is complete.
The procedure for adding BTTC tokens to MetaMask is essentially identical to that described above. Before adding: You only need to enter the correct BTTC URL in the custom RPC.
Mutiple Accounts
If this is your first time using MetaMask, this article will walk you through the process of creating multiple accounts.
As shown in the figure, click the circular pattern in the upper right corner and then click Create Account.
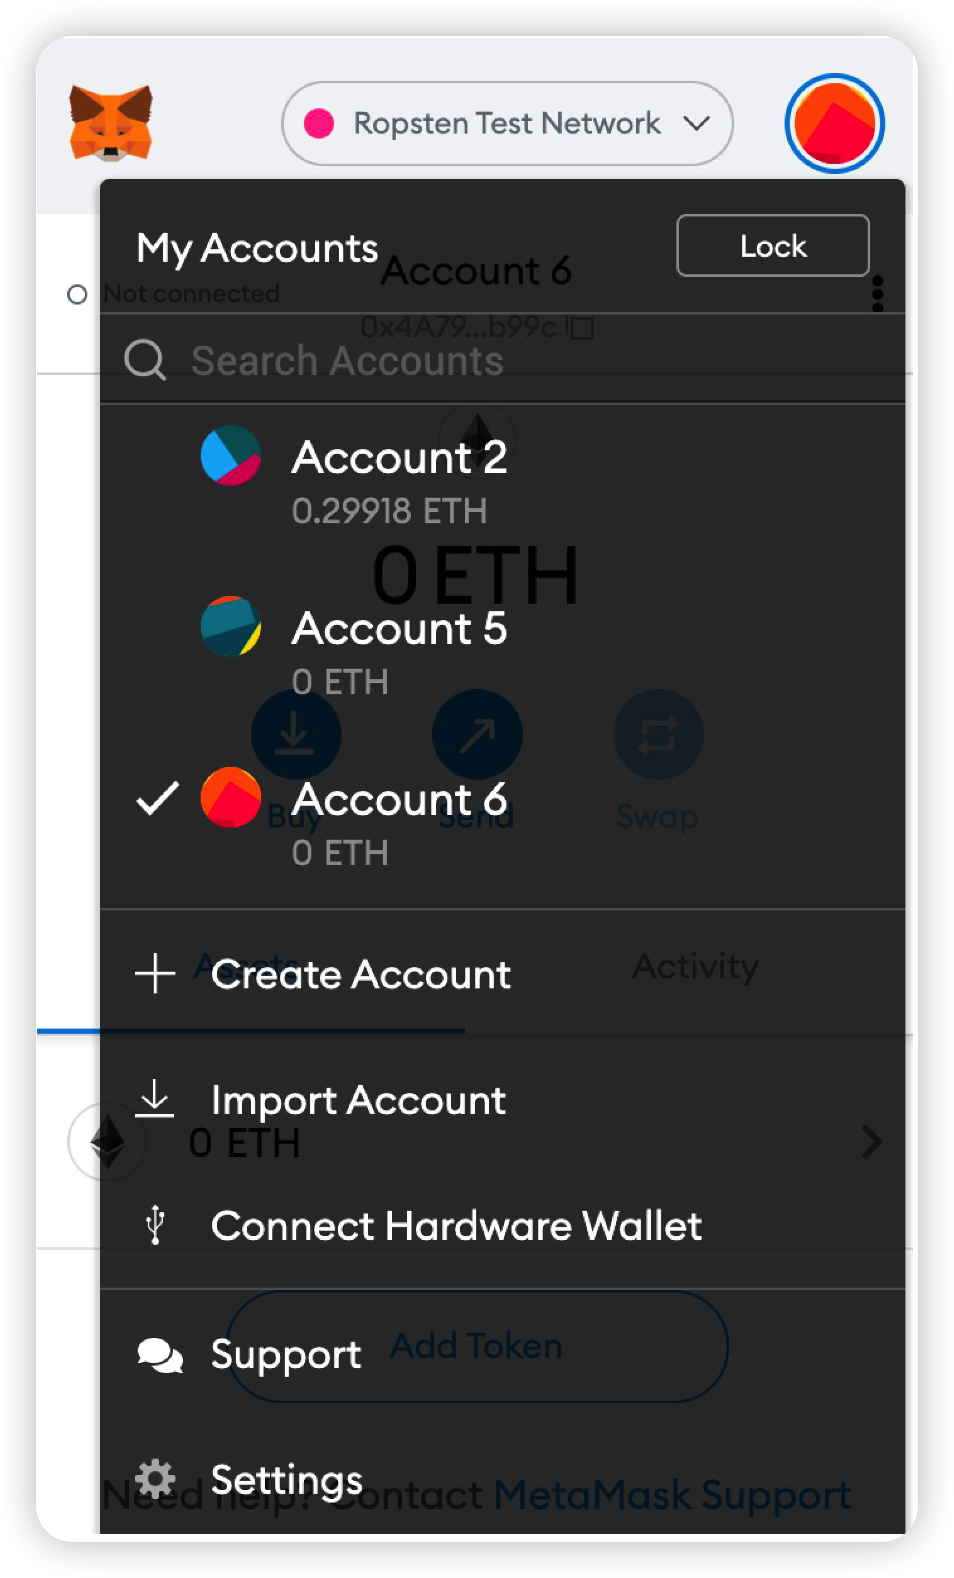
Then enter the account name (any name can be used) in the window.
Integration
Configure Web3
Install web3 in your dApp:
npm install --save web3
Create a new file named web3.js, and enter the following code:
import Web3 from 'web3';

const getWeb3 = () => new Promise((resolve) => {
 window.addEventListener('load', () => {
   let currentWeb3;

   if (window.ethereum) {
     currentWeb3 = new Web3(window.ethereum);
     try {
       // Request account access if needed
       window.ethereum.enable();
       // Acccounts now exposed
       resolve(currentWeb3);
     } catch (error) {
       // User denied account access...
       alert('Please allow access for the app to work');
     }
   } else if (window.web3) {
     window.web3 = new Web3(web3.currentProvider);
     // Acccounts always exposed
     resolve(currentWeb3);
   } else {
     console.log('Non-Ethereum browser detected. You should consider trying MetaMask!');
   }
 });
});

export default getWeb3;
The getWeb3 function of exports is used in the above code to request access to the MetaMask account by detecting the MetaMask-injected global object (Ethereum or web3).
The MetaMask document is described as follows:
MetaMask injects a global API into websites visited by its users at window.ethereum (Also available at window.web3.currentProvider for legacy reasons). This API allows websites to request user login, load data from blockchains the user has a connection to, and suggest the user sign messages and transactions. You can use this API to detect the user of a web3 browser.
Then import the file into the client code:
import getWeb3 from '/path/to/web3';
And call the following function:
  getWeb3()
    .then((result) => {
       this.web3 = result;
    });
Setup Accounts
When sending non-query transactions, a signer account (private key) is required.
  this.web3.eth.getAccounts()
  .then((accounts) => {
    this.account = accounts[0];
  })
getAccounts() returns a list of all the accounts on the user's MetaMask, with accounts[0] being the first one.
Instantiate Contract
After creating a web3 object, we need to instantiate the contract, which requires the contract's ABI and address.
const myContractInstance = new this.web3.eth.Contract(myContractAbi, myContractAddress)
Call Contract
Now that the contract object has been instantiated, we can call contract methods.
The send() method is used to modify the state of the chain, and the call() method is used as queries.
Call the function call()
  this.myContractInstance.methods.myMethod(myParams)
  .call()
  .then (
    // do stuff with returned values
  )
Call the function send()
  this.myContractInstance.methods.myMethod(myParams)
  .send({
    from: this.account,gasPrice: 0
  })
  .then (
    (receipt) => {
      // returns a transaction receipt}
    )